We had published a series of articles on Christmas photography and there is one dedicated to photographing Christmas lights. However ever since the article was published I’ve been receiving mails asking about camera settings to effectively capture Christmas lights.
 |
| Photo by: Justin Brown |
It is evident from the question itself that some of our readers find it hard to figure the right combination of exposure values manually. So here are certain settings for your digital camera that will ensure that you get what you desire, no matter what the prevailing conditions are. With these settings you simply can’t go wrong. Among the bunch of pictures you take, you will surely find the one that your heart desired.
Best Digital Camera Settings for Photographing Christmas Lights
1. Set file format to RAW
 |
| Camera RAW File Format |
2. Set White balance to Daylight or Tungsten (I know you can change it later if you shoo RAW, but just do it)
 |
| camera daylight white balance |
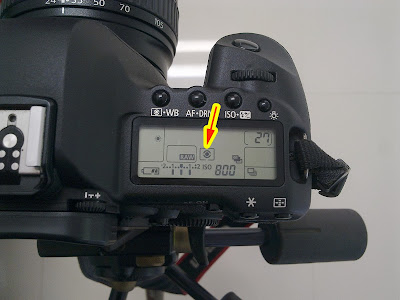
3. Set ISO to ISO 800
 |
| camera iso settings |
4. Set Metering mode to Matrix / Evaluative
 |
| camera matrix or evaluative metering mode |
5. Set focusing to center focus point only
6. Set camera to Program (P) mode
 |
| camera program shift shooting mode |
7. Set drive mode to Continuous
 |
| camera continuous shooting mode |
8. Set Auto Exposure Bracketing to 1 stop.
 |
| camera automatic exposure bracketing |
9. Whenever possible shoot with your camera on a tripod or set on a stable surface. (when shooting on tripod set ISO to ISO 100)
10. Any lens within focal lengths of 18mm to 35mm will be the ideal choice depending on your camera format.
Why these settings work?
RAW file format ensures that you have at least a 1 stop margin of error for exposure. It also makes it possible to shift the white balance to any mode in post processing.
We are setting ISO to ISO 800 because it will ensure reasonably fast shutter speeds to get sharp pictures when shooting handheld. Most modern cameras handles noise very well up to ISO 800, some could even give you clean pictures with much higher ISO’s. Thus ISO 800 is chosen as the best compromise between image blur and image noise.
Matrix or Evaluative metering mode is the most advanced metering mode in today’s digital camera. When set to this mode the camera divides the entire frame into many small grids and evaluates light levels within all these grids; it then compares the data with thousands of similar scenarios which are already stored in the camera's memory before deciding the exposure values.
We are setting the focus to center focus point only because center focus point is the most sensitive focus point in most digital cameras. Having only one focus point ensure s that the camera does not accidentally focus on any other area than what the photographer intended. Focus on the part of the scene with your center focus point and use focus lock to recompose your frame.
We are making use of the Automatic Exposure Bracketing feature of the modern digital cameras to cover any exposure error. When we shoot in Program mode with 1 stop A.E.B and continuous shooting mode the camera takes three different pictures with 3 different exposure settings changing both Aperture and Shutter Speed.
For example
If we are photographing a scene in program mode with 1 stop AEB and the camera meter is indicating aperture f/7 and shutter speed 1/200 @ ISO 800.
- The first picture will be taken with the above settings – which will be the correct exposure as per camera meter.
- Then the camera will take a 1 stop under exposed picture. New exposure will be aperture f/8 and shutter speed 1/320 @ ISO 800.
- Finally the third picture will be a 1 stop over exposed picture. New exposure will be aperture f/5.6 and shutter 1/160 @ ISO 800.
The camera is shifting both aperture and shutter speed to get to the desired exposure values because we are in Program mode, had we been using Aperture Priority or Shutter Priority mode instead only one variable (either aperture or shutter speed) will be change depending upon the mode selected. But for photographing Christmas lights I find Program mode and the auto bracketing feature to be the best combination.
So between RAW file format, and 1 stop exposure bracketing we are actually talking about possibility to correct exposure up to 2 stops, the need for which will be hightly unlikely with the Matrix or Evaluative metering.
Shooting Tips
Whenever possible take your reading from a neutral area of the scene, do not meter directly from the lights or from the shadows, this will ensure accurate exposures.
Shoot in bursts, take three shots continuously by keeping the shutter pressed this will ensure you get all three frames with same composition and also reduce chances of shake.
If you find that your camera is struggling to achieve focus (modern cameras seldom face this issue) shift to manual focus and focus manually. You can use live view mode if your camera has the option and use the zoom in feature to ensure accurate focus.
Remember if you turn off your camera, the Auto exposure bracketing will be reset (depends on your camera make and model) and you will have to set it again.