 |
| Photo by: David Kingham |
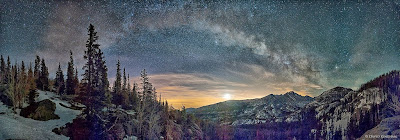
The jingle that was learned in kindergartens (Twinkle! Twinkle! Little star; how I wonder what you are!); follow human minds all through his/her life; and photographer is no exception! Beginners with their newly acquired cameras chase flowers during day and stars during night. No doubt; Photographs of star-lit sky esp. the Milky Way has always amazed people. The so called Milky Way is a faint band of light made up of innumerable number of stars, planets, satellites and comets. That constellation include our own Sun, the mother earth and seven other planets, various satellites that go round like moon known as Solar System.
It is quite natural that astral/astro photographers, astronomers and all genres of sky-gazers are either bedazzled or intrigued by this wonderful celestial configuration. Most amateur photographers take photograph of the Milky Way and proudly show to their friends and relatives and of course clients presuming that those images are outstanding ones.
 |
| Photo by: Bertrand Monney |
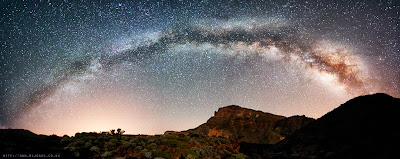
With the advancements in digital photography, photographing the Milky-Way is now well within the means of a common man and not just some privileged few like astro photographers. And the good news is; Milky-Way is not only one of the easiest of subjects in astro photography but also the most impressive. This article discusses practical ways to capture stunning photographs of the Milky Way in an easy to digest step by step manner.
What do you require to photograph the Milky Way?
 |
| Photo by: Carl Jones |
- A DSLR camera, any dslr would do but the one’s that could handle high ISO noise really well are the best for our job.
- A Wide Angle Fast Lens, the faster your lens is the better it is at capturing light; wide angle prime lenses with a maximum aperture of f/2.8 or faster, preferably 24mm or wider for a full frame camera is ideal.
- A Sturdy Tripod and head is a must.
The above mentioned are three things are necessary, as far as equipment requirement goes; given below are some other elements that are equally important to capture the Milky Way with all its splendor.
- A Dark, Clear Night – a dark night sky preferably on a new moon with little light pollution is a must.
- Flashlight or Headlamp – are not to improve the quality of your photos but will certainly make your night-life easier, helping you navigate in the dark, adjust controls et cetera. They may come in to use to do a little bit of light painting or if you wish to include some foreground element in the shots.
- Planning – as in all other cases it takes a lot of planning to capture amazing photographs of the Milky Way.
- Patience – patience is a virtue and you’ll need a lot of it to succeed in astro photography.
Now we will look into these as well as the camera settings and the actual shooting technique in detail.
Planning Your Shoot
 |
| Photo by: Dave Soldano |
To get great shots one should first do his/her homework and first learn how to find the Milky Way, which direction to look for, at what time of the year/night etc. A good resource in this regard can be had from software called ‘Stellarium’, follow the link to download it, it is free and tell you how the sky will look from any location at any given time.
Look for Scorpius/Sagitarius constellations in Stellarium. The center of the Milky Way is right between Sagittarius and Scorpius and this is the brightest part of the Milky Way and it is where your camera need to be pointed at. Take note of the direction and also the best time of the night to shoot (this is usually when the constellations are higher in the sky rather than in horizon).
IPhone or Android Star Map App
There are star map apps that you could download and use on your Smartphone, Google Sky Map for Android or Night Sky Lite for iPhone are both free and easy to use star map apps that are excellent tools for finding the center of the Milky Way.
Find a Dark Location on a Dark Night
 |
| Photo by: Jon Martin |
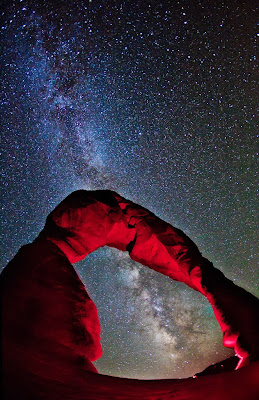
This is perhaps the hardest part in the process of shooting the Milky Way, light pollution from the cities is a major issue and because of this the Milky Way is not visible from many parts of the world. So be prepared to travel long distances in search of the perfect place to shoot it. For those of you who live in North America cleardarksky.com has clear sky charts that will help you find light pollution maps and forecasts for locations with the darkest skies.
Plan your shoot sometime between the last quarter and first quarter of the moon calendar, ideally during a new moon. This is not a hard rule, but the closer date to the new moon, the more time you will have during the night with dark, moonless skies. Lastly, keep in mind that the “galactic center” of the Milky Way is visible in the sky longest from April to September toward the south half of the sky.
Composing your shot
 |
| Photo by: Ray Christy |
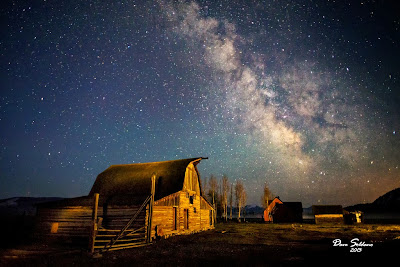
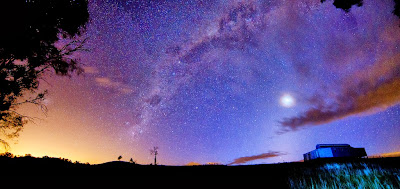
Framing the shot as a standard landscape picture and including foreground elements will give your shot a sense of depth and will make it much for interesting that just framing the sky. Use any landscape features like mountains, hills, trees, rocks or even man made features like a windmill, a mobile tower or even a person could be included in the shot, there is no limits to creativity, let your imagination run wild.
Focusing at Night
If your camera has live view function, then the best way to focus at night is using live view. Focus on a bright star, zoom in your display to check focus. If your camera does not have live view function you could set your lens to infinity, it is marked on the lens by a sideways 8 symbol.
Setting up and Taking your Shot
 |
| Photo by: Ray Christy |
First and foremost we need to confirm that our framing and composition is right, we have all the elements as we wanted, to help us verify it we will first take a couple of test shots using the following settings.
Set your lens to its maximum aperture (wide open).
Set the camera to its highest ISO setting.
Frame your shot as you think will work and take a couple of test shots, it won’t be usable due to high ISO noise, but these short exposures makes it possible to move the camera around quickly and experiment with different framings to determine which works best for our scene. At high ISO’s our camera sensors are far more sensitive than our eyes. Once we have found the best composition and shooting angle, we will proceed to the actual shoot.
Photographing the Milky Way
 |
| Photo by: David Kingham |
- Set your camera on the tripod
- Compose the frame
- Set you camera to Manual Mode (M)
- Set your lens to its maximum aperture setting (wide open)
- Set your lens to manual focus
- Focus using live view
- Set your camera to ISO 800 or ISO 1600 (this should the largest ISO possible with your camera that will render a usable picture).
- Set high iso and long exposure noise reduction on
- Set shutter speed to 20 seconds.
- Take your shot.
Review your shot in your cameras LCD, zoom in and observe the stars towards the borders, if you see blur due to star trails, take another shot with a shorter exposure duration. If the original shot did not have any star trails take another shot with a longer exposure. Repeat the process until you find the longest exposure possible without trails.
Fixing Comma
 |
| Photo by: Bill Shupp |
While shooting the Milky Way; sometimes stars appear in triangular shaped towards the border. This is due to an optical defect of your lens and could be fixed by stopping down your lens, usually stopping down one stop is all it takes to fix the issue (from f/2.8 to f/4).
Getting Creative
 |
| Photo by: slworking2 |
Now that we know how to properly capture the milky way in our shots, let’s try different framings and compositions and also with choice our foreground elements. Due to the earth’s rotation the Milky Way will move allowing you different compositions during different times of the night.
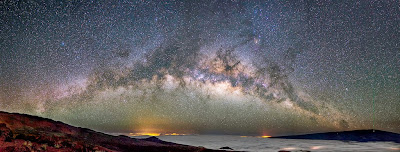
The band of our galaxy can be shot in vertical or horizontal orientation and a diagonal one in the middle. Another technique that can be tried is to capture a panorama of the whole band of Milky Way in the sky, the process is just the same as any other subject but only thing you need is a slightly more overlap between frames; so that it would be easier to stitch them with the help of software.
The celestial bodies including the Milky Way seem to cast their spell on human beings not only when they are alive but even after their death; otherwise the poet would not have penned the following lines
“Under a wide and starry sky;
Dig the grave and let me lie!