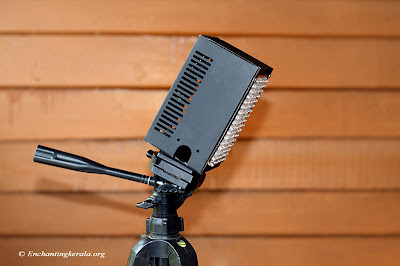
Lighting is the primary and most important aspect of photography, different lights suits different occasions and uses. I have been planning to build a led light panel for product photography for quite some time. And at last today I found time to complete the project.
 |
| DIY LED Light Panel for Photography |
Materials you might need for this project
- One case to hold the light panel, connections and switch.
- One PCB
- White led 187. better get 200 because some of them simply do not work or produce a different shade.
- 590 ohm resistors 62 no
- Wire, soldering iron, lead, paste.
- One Switch
- One mono pin to act as power socket.
- One size 10 nut of 1/4 inch thread
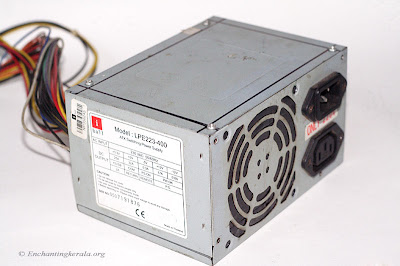
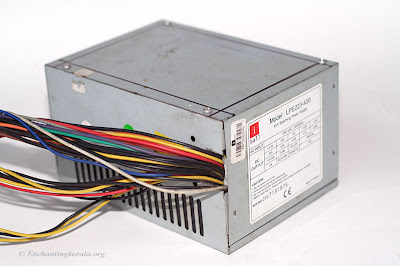
Looking for a case to hold my diy led light panel i found this case of my old SMPS. This will suit my purpose perfectly as it is the right size for my pcb and also it is metal and light weight.
 |
| DIY LED Light Panel for Photography |
The lines on the top are my markings to cut the top. The opening should be a bit smaller than the size of your pcb.
 |
| DIY LED Light Panel for Photography |
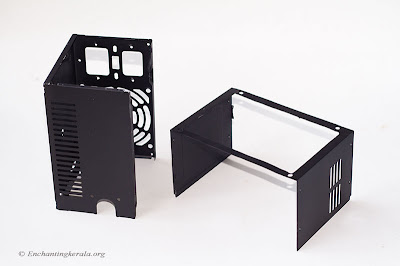
Now i have cut the top portion and painted the box with matt finish black paint to give it a professional look.
 |
| DIY LED Light Panel for Photography |
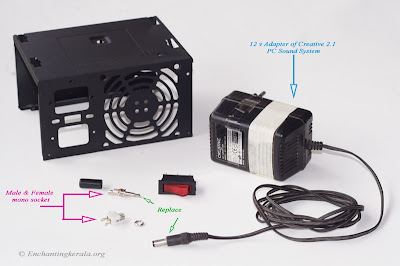
In this project i'm using a 12 volt adapter of my old creative 2.1 sound system as my power source.
 |
| DIY LED Light Panel for Photography |
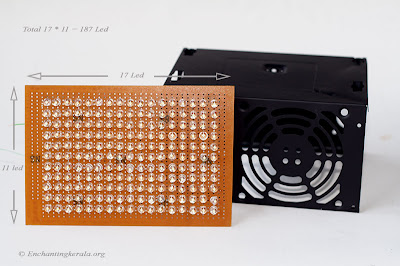
Its time now to arrange the led's on the pcb. The next picture has wiring diagram to help you arrange the led's in the panel.
 |
| DIY LED Light Panel for Photography |
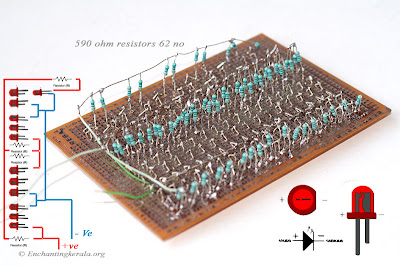
Since i am using a 12 volt power source and the white led i choose is of approx 3 volt i am using 3 led's in serial along with one 590 ohms resister.
 |
| DIY LED Light Panel for Photography |
As my knowledge in electronics is limited what i did was to experiment with various settings for my power source, i made different combinations of led's and resistors and let it run for a whole day, i had 4 led's in series and 3 led's in series with various combinations of resistors. And on the second day arrived at the conclusion that this combination gives the optimum light and life for my led's. So if you are not sure about the voltages and ratings of led's etc, it is better to try out different combinations running a single serial with 3 or 4 leds and various combinations of resistors and choose the one that works best.
 |
| DIY LED Light Panel for Photography |
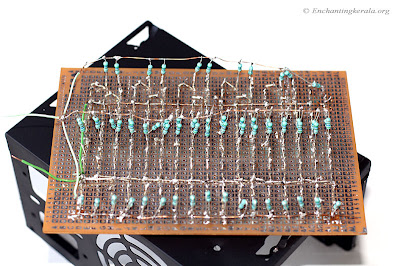
In the above circuit, the positive charge enters through the resistor on to the first series of 3 led's. ie; + (+ -, + -, + -) - and then 3 led's in series are reversed so - (-+, -+, -+) + then again 3 leds in series as in the first case + (+ -, + -, + -) -. Remaining 2 rows are connected in L shape. As you can see in my circuit i have 4 parallel lines. ( 4 positive lines and 4 negative lines) I have connected all the four Positive lines together and all the negative lines together (parallel connection). And thus my circuit is complete.
 |
| DIY LED Light Panel for Photography |
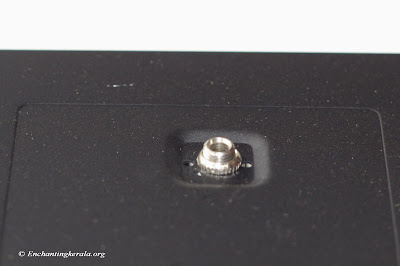
I've now connected the power socket to the casing. I used one hole that was already there in the centre of the back side of the case so i didn't have to drill one.
 |
| DIY LED Light Panel for Photography |
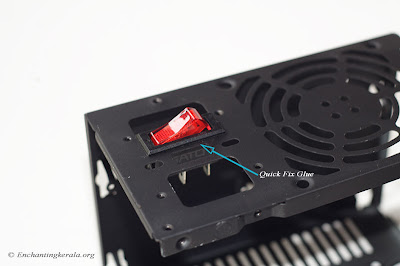
Similarly i fixed the power switch on the hole from where i removed the original power adapter of the SMPS. Some SMPS units have an inbuilt switch, if you find one with a switch you could make use of it.
 |
| DIY LED Light Panel for Photography |
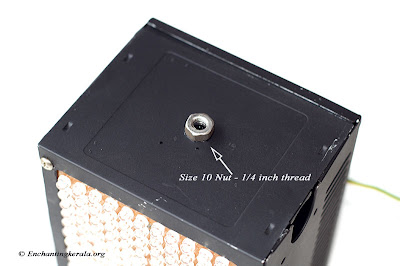
I fixed the size 10 nut on the bottom part of the case using quick setting adhesive. You might as well use any adhesive you trust that bonds metal to metal.
 |
| DIY LED Light Panel for Photography |
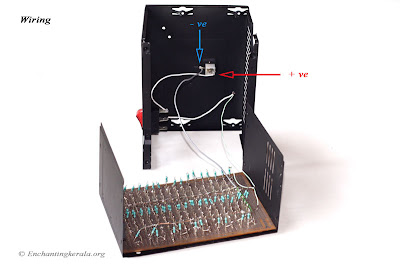
The inner wiring is simple the positive passes through the power switch to the positive end of the circuit and the negative goes directly to the circuit board.
This is how my finished diy led light panel looks.
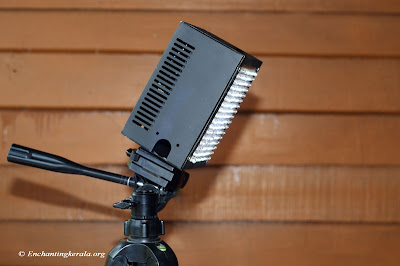 |
DIY LED Light Panel for Photography |
In the next article we will discuss about Photography - DIY - DIY Bellows Extension Tube - Macro in a budget series part VI
Related Reading
- DIY Home made Fold-able Softbox
- DIY Homemade Softbox
- DIY Softbox
- DIY Portable Light Reflector for Photography
- DIY LED Light Panel for Photography