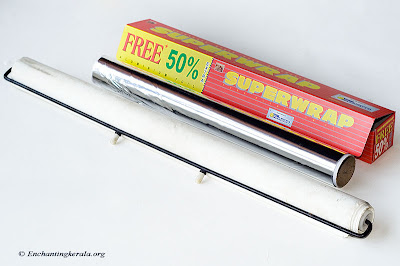
Light reflectors are one of the most essential tools of photography. They allow you to multiply the sources of light, fill in the shadow areas, highlight the shiny areas etc etc, the uses are endless. Let us see how we can make a light reflector out of a car window shade.
 |
| DIY Portable Light Reflector for Photography |
Materials needed for this project
- One car window shade
- Aluminium foil
- Adhesive tape
The advantage of using car window shade as a reflector is that it is portable, it could easily be folded (just release the lock and it winds up itself… cool…). And if you are actually using it in your car it improves the efficiency of what it does in the car. Another thing is that if you have your car nearby, you also have your reflectors handy in case you need them.
The car window shade that we are using has two sides one is white and the other has a design. What we do is to cover the designed surface with aluminium foil so it also becomes a reflective surface. So now we have the option of using both sides of our shade. One is white for softer light and one is surface covered with aluminium foil which will provide a little more reflection and contrast to the image.
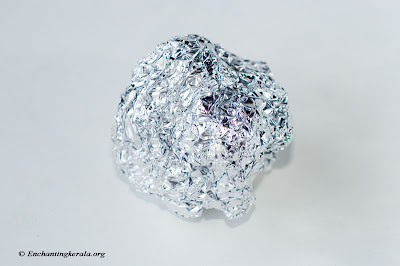
First cut out the required length of aluminium foil. You could tape the foil as such on to the shade but its efficiency is increased if you have wrinkles on its surface.
So fold it in order to get a wrinkled surface. This is tricky because if you are not careful enough you will not be able to straighten it again without tearing it into pieces.
 |
| DIY Portable Light Reflector for Photography |
Ok so now we have our wrinkled aluminium foil ready to be stuck onto the shade. Remember it is ok even if you accidentally tear it while unfolding it what you could do is instead of using the adhesive tape on the sides to stick the foil to the shade, spread some adhesive on to the shade and paste the foil on to it. Because of the wrinkled surface, once you finish pasting it will only look as a seamless piece and the joints won’t be visible.
 |
| DIY Portable Light Reflector for Photography |
Stick the foil on to the shade using adhesive tape and your portable light reflector is now ready for duty.
 |
| DIY Portable Light Reflector for Photography |
You could use some Clothes Hanging Pegs / Clips to lock the reflector at the desired size. Once you take out the clips it automatically winds up.
 |
| DIY Portable Light Reflector for Photography |
Once extended to full length it could provide enough reflection to light up fairly large subjects.
In the next article we will discuss about Photography - DIY - DIY LED Light Panel
Related Reading
- DIY Bellows Extension Tube for Extreme Macro Photography
- DIY Lens Reversal Cap / UV Filter for Macro Photography
- DIY Macro Ring Light for Macro Photography
- DIY Extension Tube for Macro Photography
- DIY Lens Reverse Ring for Macro Photography